
Learn how to deploy an elastic computing cluster in the AWS cloud with Nextflow
In the previous post I introduced the new cloud native support for AWS provided by Nextflow.
It allows the creation of a computing cluster in the cloud in a no-brainer way, enabling the deployment of complex computational pipelines in a few commands.
This solution is characterised by using a lean application stack which does not require any third party component installed in the EC2 instances other than a Java VM and the Docker engine (the latter it’s only required in order to deploy pipeline binary dependencies).
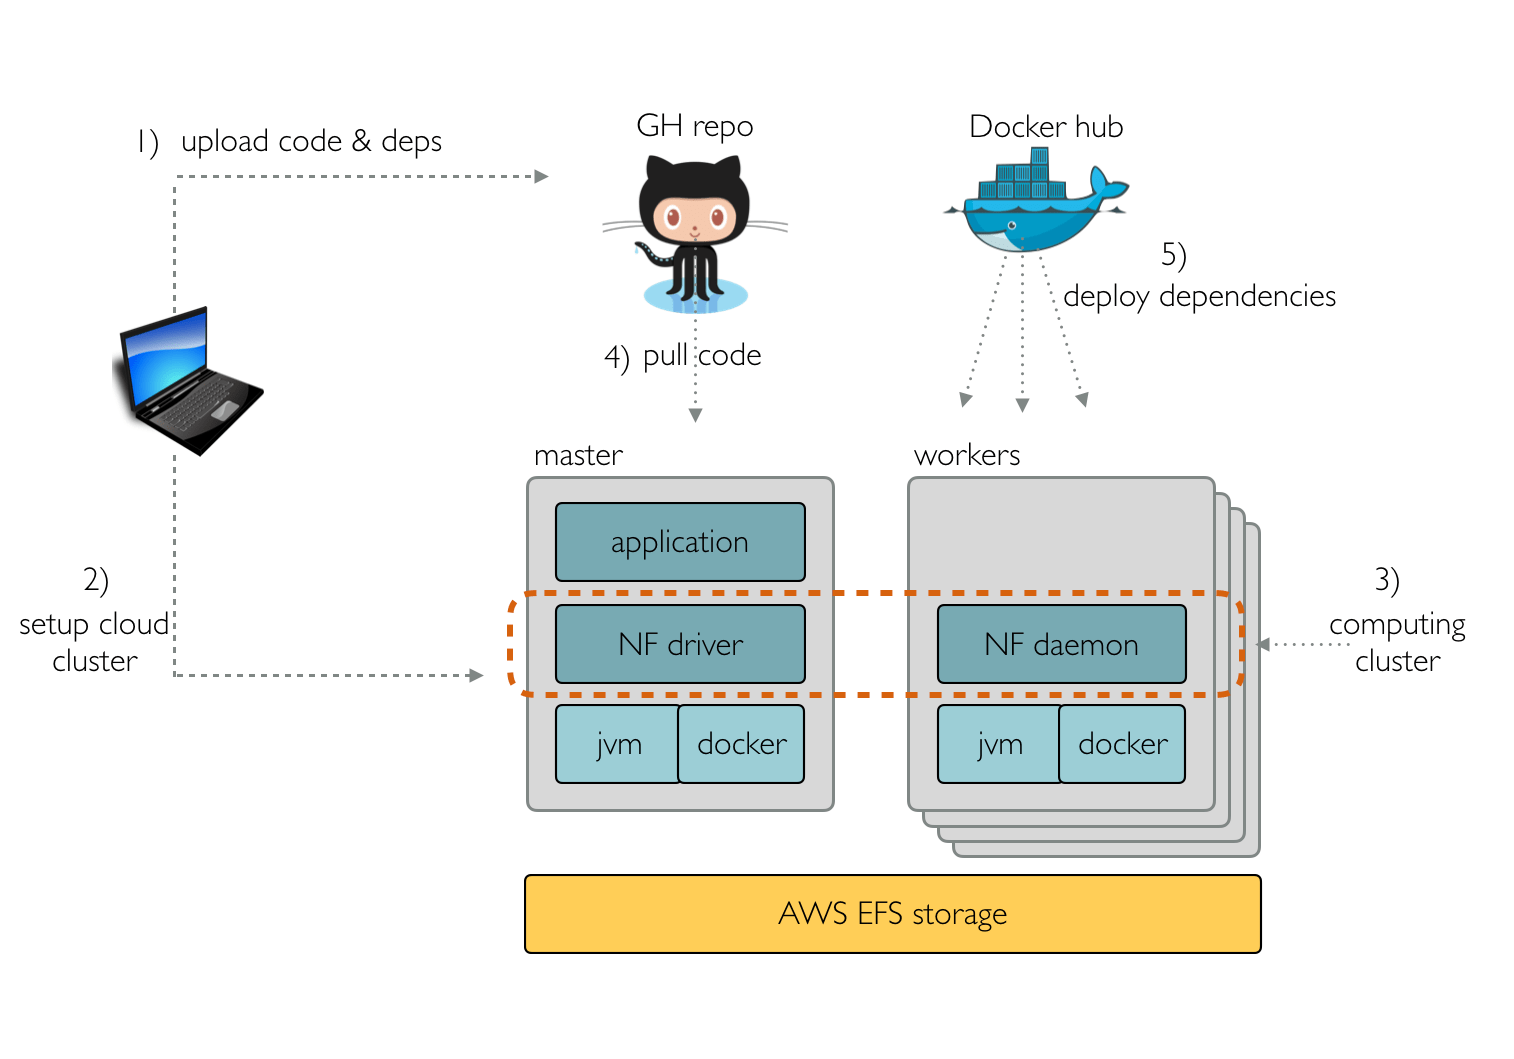
Each EC2 instance runs a script, at bootstrap time, that mounts the EFS storage and downloads and launches the Nextflow cluster daemon. This daemon is self-configuring, it automatically discovers the other running instances and joins them forming the computing cluster.
The simplicity of this stack makes it possible to setup the cluster in the cloud in just a few minutes, a little more time than is required to spin up the EC2 VMs. This time does not depend on the number of instances launched, as they configure themself independently.
This also makes it possible to add or remove instances as needed, realising the long promised elastic scalability of cloud computing.
This ability is even more important for bioinformatic workflows, which frequently crunch not homogeneous datasets and are composed of tasks with very different computing requirements (eg. a few very long running tasks and many short-lived tasks in the same workload).
The Nextflow support for the cloud features an elastic cluster which is capable of resizing itself to adapt to the actual computing needs at runtime, thus spinning up new EC2 instances when jobs wait for too long in the execution queue, or terminating instances that are not used for a certain amount of time.
In order to enable the cluster autoscaling you will need to specify the autoscale
properties in the nextflow.config file. For example:
cloud {
  imageId = 'ami-4b7daa32'
  instanceType = 'm4.xlarge'

  autoscale {
     enabled = true
     minInstances = 5
     maxInstances = 10
  }
}
The above configuration enables the autoscaling features so that the cluster will include
at least 5 nodes. If at any point one or more tasks spend more than 5 minutes without being
processed, the number of instances needed to fullfil the pending tasks, up to limit specified
by the maxInstances attribute, are launched. On the other hand, if these instances are
idle, they are terminated before reaching the 60 minutes instance usage boundary.
The autoscaler launches instances by using the same AMI ID and type specified in the cloud
configuration. However it is possible to define different attributes as shown below:
cloud {
  imageId = 'ami-4b7daa32'
  instanceType = 'm4.large'

  autoscale {
     enabled = true
     maxInstances = 10
     instanceType = 'm4.2xlarge'
     spotPrice = 0.05
  }
}
The cluster is first created by using instance(s) of type m4.large. Then, when new
computing nodes are required the autoscaler launches instances of type m4.2xlarge.
Also, since the spotPrice attribute is specified, EC2 spot
instances are launched, instead of regular on-demand ones, bidding for the price specified.
Nextflow implements an easy though effective cloud scheduler that is able to scale dynamically to meet the computing needs of deployed workloads taking advantage of the elastic nature of the cloud platform.
This ability, along the support for spot/preemptible instances, allows a cost effective solution for the execution of your pipeline in the cloud.